
If you saw my post about the cake we made for Toby’s fourth birthday recently then you may have noticed me mention my fool proof sponge cake recipe. Well, I thought that sponge cake deserved a post all of its own. So here is my step-by-step guide to the perfect fool proof sponge cake, and if you are a seasoned baker then please forgive me if I am patronising you – I really wanted to go basic so that anyone can follow this recipe and get great results every time.
Ingredients
- Egg(s)
- Stork baking spread (or unsalted butter)
- Caster sugar
- Self-raising flour (or plain flour and baking powder)
- Vanilla extract
Method
First pre-heat your oven to 180°C (Fan) / 190°C (non-fan)
Prepare your cake tin/ cases – this recipe can be used to make cup cakes, sandwich cakes…pretty much anything you want to put the cake in. For sandwich tins I grease with a bit of Stork (just wipe it round with a bit of kitchen roll) and then put a greaseproof paper circle in the bottom. On this occasion I was making fairy cakes so put paper cases in a muffin tin.
Next, weigh your egg(s) – shells on is fine. You can make six small cupcakes with one egg, two eggs is enough for two 18 cm (7″) sandwich tins, three eggs will make two 20 cm (8″) cakes. And the beauty of this recipe is you can just keep scaling up. For the large rectangular cake I made for Toby’s Numberblocks cake I used five eggs.

My egg weighed 62 g so that meant I needed 62 g of Stork (or butter), 62g caster sugar and 62 g of self-raising flour.

After you’ve weighed the egg put it to one side then weigh your Stork and caster sugar into a bowl. Cream together the butter and sugar – this just means beat them together. I like to use an electric hand whisk but you can do it in a food processor or with a wooden spoon.

You can stop when the butter and sugar are completely combined and the mixture is light and fluffy. Now is a good time to scrape down the sides of your bowl. I use a silicone spatula for this job.

Next add half a teaspoon of vanilla extract (not essence) to the butter and sugar mix. If you do a lot of baking then I would definitely recommend getting a set of measuring spoons as they’re really handy – I have some like this. If you are using two or three eggs then add one teaspoon of vanilla extract.

At this point you also want to add your egg and one large spoon of your flour. This doesn’t need to be an exact amount but weigh it so you know how much you still need to add. Adding the flour here can help to stop the mixture from curdling.

Beat all these ingredients together and you’ll have a rather sloppy mixture. By the way, don’t worry if your mixture does look a bit curdled or separated at this point – it will be fine once you mix the rest of the flour in.

Mix in the rest of the flour – some recipes say you should fold the flour in but to be honest I always just whisk it in and I’ve never had any problems. Likewise I don’t usually bother sieving the flour either. I used self-raising flour (just make sure it’s in date – it won’t do you any harm but the raising agents stop working as well). You can also use plain flour, just add a teaspoon of baking powder too. I always used to use baking powder even when using self-raising flour but I actually forgot this time and the cakes came out fine so you probably don’t need it! Oh, and if you want to make chocolate sponge just replace about a quarter of the flour with cocoa powder.

Next, spoon the mixture into whatever tin or case you are using. Try to split it as evenly as you can between them.
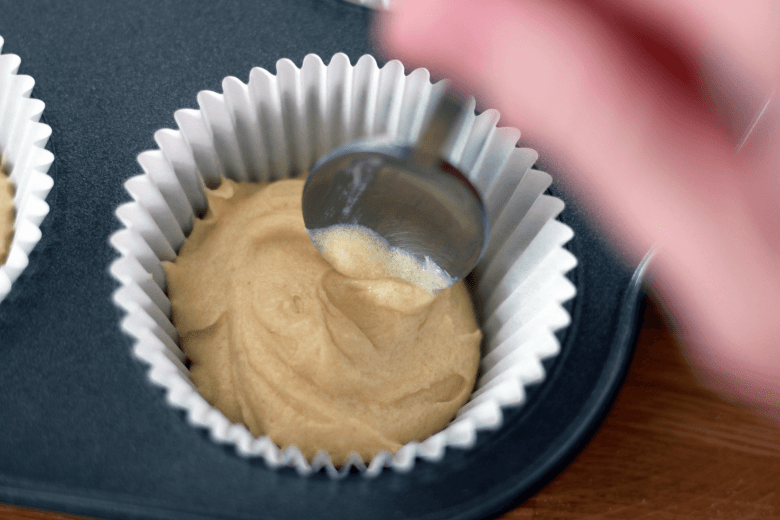
It’s worth trying to level the top of your mixture as much as you can. I swirled a teaspoon round the top of my fairy cakes, or you could use your spatula on bigger cakes. Don’t worry about getting it completely level, just as long as it’s not massively lopsided.

Then you need to put your cakes in the oven. Now I’ve always found that timing isn’t an exact science and you really need to just keep an eye on them. Cupcakes will normally take between 10 and 15 minutes, two sandwich cakes about 25-35 minutes. You know they’re done when they’re golden brown, the top springs back if you press it, and a skewer or knife poked into the middle comes out clean. You don’t want to keep opening the oven door to check though – leave it until you think they are almost ready.

When the cakes are done, take them out and leave to cool on a wire rack. If you don’t have one, don’t worry – I used to use the rack from my grill pan.
And that’s it – a fool proof sponge cake recipe. Once the cakes are cooled you can then decorate them however you want. Add jam and cream for a Victoria sponge, or buttercream for a sandwich cake or cupcakes. For these fairy cakes though we went for a simple water icing (just icing sugar and water) as the boys were too impatient to wait for me to make buttercream.

We just put a spoonful of icing on top of each cake then added a liberal selection of sprinkles that I dug out of the cupboard.

They were delicious if I do say so myself – they were so light and fluffy. And just making six was perfect. I love baking with the boys (well Toby anyway!) but we don’t always want loads of cakes that take days to eat.

So there you have it; my super quick and easy sponge cake recipe. And if even this seems to tricky for you, you can always follow my mum’s method and just chuck all the ingredients in the food processor together and whizz until it looks like cake mixture!

Oh and just so you don’t think my life is all cupcakes and sprinkles…here’s Gabe having a strop because he wasn’t allowed to eat his cake yet when the icing was all still runny!

If you liked this recipe please feel free to Pin it for later. And I’d love to hear if you have any fool proof recipes that work every time too.

**This post contains affiliate links.


I’d never thought of weighing the eggs before!!! Maybe this is where I’ve been going wrong all this time! I’ve got a cake to make very soon, so I shall be giving this a go 🙂
This is a great recipe…It sounds perfect!
I love that photo of Gabe at the end. hehehe x
i find this works everytime